When it comes to enterprise operating systems where you are not paying a company for support, there's nothing quite like CentOS. The Community ENTerprise Operating System does a phenomenal job of following the Red Hat cycle and providing an Enterprise class OS without having to fork out a lot of money for it. It is perfect for small and medium businesses, or for a great platform to start learning on.
So here we go with our install.
- First things first, we need to download the CentOS iso. The one to pick comes from personal choice, but if unsure, download the dvd iso.
- If you are installing to a phsyical machine, you will need to burn this iso to a dvd, or make a bootable usb out of it.
- If you are installing to a virutal machine (i.e. vmware, virtualbox, or some other virtualization software) then you can boot directly form the iso.
- Once you have booted to the dvd/iso you are asked if you want to install CentOS or test the media. If this is your first time installing with this iso, I'd recommend doing a quick test, otherwise, just continue with the install.
- You will see a lot of text come across the screen shortly followed by a graphical screen asking you for your install language.

- Next set your time zone, for myself, I will be choosing America, Boise.


- Next we will select the Software that we want to Install. For our Install today, we are going to Use the GNOME Desktop for our choice. I would also recommend the following add-ons for the environment:
- GNOME Applications
- Internet Applications
- Office Suite and Productivity
- Development Tools
- Security Tools
- Next we need to select our Installation Destination
- On our system, we have 2 hard drives. 1 100 Gb Hard Drive, and 1 20 Gb Hard Drive. We will be installing our system on our 100 Gb Hard Drive. Also, we will be doing a custom partitioning scheme.

- For our partition scheme we will use the following partition setup:
- The reason for this setup is several fold, and I won't go into deep detail here, but to suffice it to say, the following setup gives us maximum flexibility and better expansion in case space is needed in the future.
- In order to create these mount points follow the screenshots below:


| Mount Point | Device Name | Device Size | Partition Type |
| /boot | /dev/sda1 | 1 GB | ext4 |
| /var | /dev/mapper/rootlv-var | 10 GB | ext4 |
| /tmp | /dev/mapper/rootlv-tmp | 10 GB | ext4 |
| /opt | /dev/mapper/rootlv-opt | 30 GB | ext4 |
| / | /dev/mapper/rootlv-root | 30 GB | ext4 |
| /home | /dev/mapper/rootlv-home | 19 GB | ext4 |

| 
|

| 
|

| 
|

| 
|

| 
|

|
- You will see the following screen, go ahead and accept the changes

- The past few steps with setting up the partitioning may seem a little confusing to begin with, but I will go into the use of LVM and the pros and cons of LVM vs. Posix Partitioning in another post.
- Now we begin our install

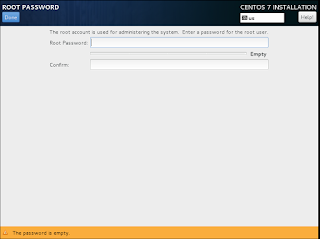
- While the Install goes, we will set a root (administrator) password, and we will create our user account.


- Now sit back and enjoy the rest of the install


No comments:
Post a Comment